How to Import Contacts to Google on Android
Whether you prefer using Google Account sync, exporting contacts to a vCard file, utilizing the default backup service, relying on third-party backup applications, syncing with other accounts, or importing contacts from a SIM card, there is a method that suits your preferences and requirements.
For individuals who aren’t tech-savvy, transitioning between phones can be a daunting and confusing task. However, with Apple’s seamless integration of iCloud and Google’s backup options through Drive storage, the process becomes much smoother.
Users can conveniently synchronize contacts, messages, call history, device settings, and more. In this article, we will focus specifically on how to back up contacts on Android devices.
When upgrading to a new phone, one of the top priorities for most people is safeguarding and transferring their contacts and messages. Android provides several methods to back up and export contacts effectively.
While some major Android-based phone manufacturers such as Samsung and Xiaomi offer native cloud solutions to backup data, it is important to note that these solutions are limited to their respective devices.
Therefore, opting for these options may not be ideal. Instead, we will explore the best approaches to back up contacts on any Android smartphone. Let’s dive in.
Method 1: Import Contacts to your Google Account on Android
Part 1: Enable Sync for Google Contacts App
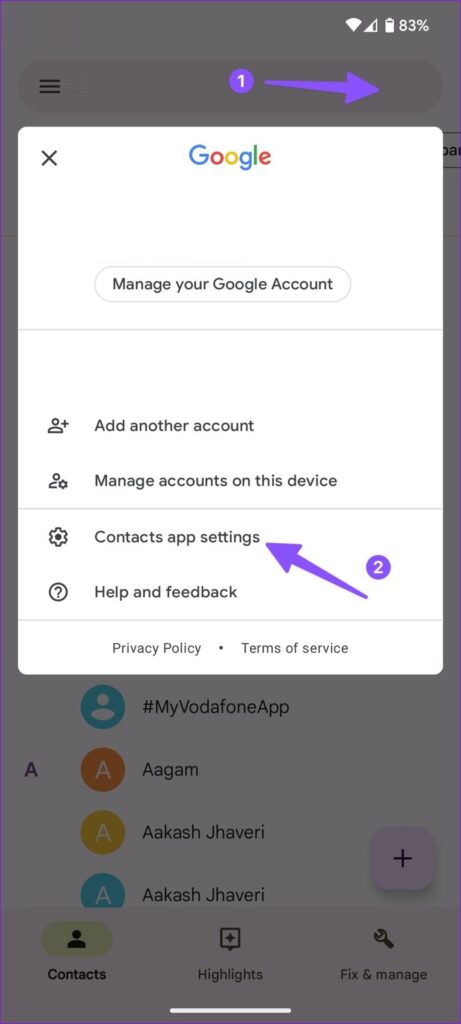
Step 1: Launch the Google Contacts application. Obtain it from the Play Store if you have uninstalled it.
Step 2: Tap the spherical profile photo symbol in the top right area and select Contacts app settings.
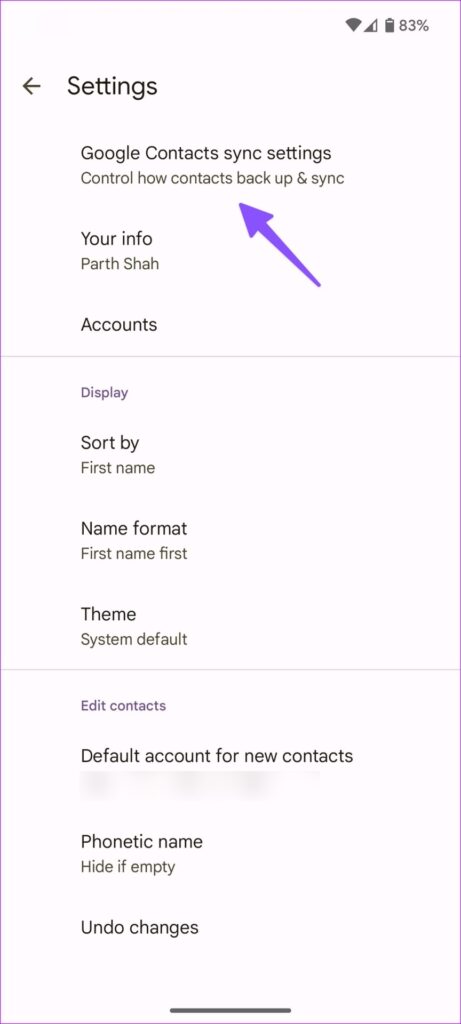
Step 3: Click “Settings for Google Contacts Sync.”
Step 4: Access the ‘Also sync device contacts’ menu.
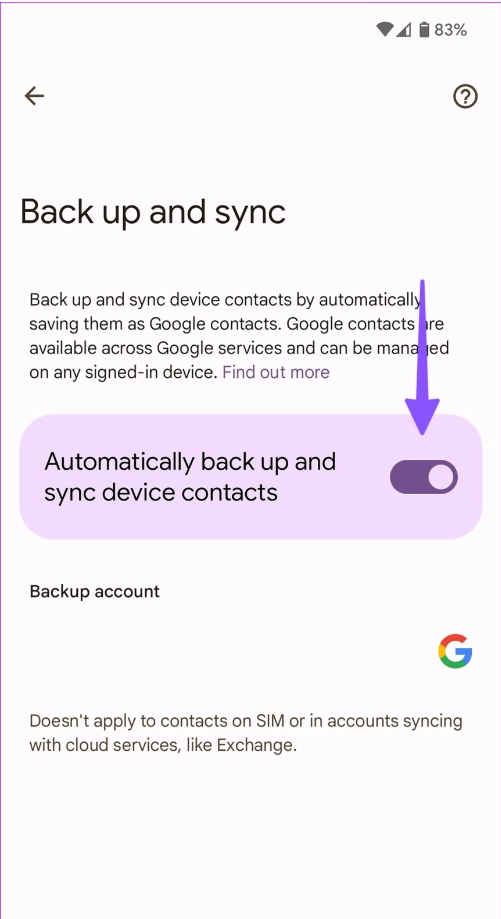
Step 5: Turn on the toggle for “Automatically back up and sync device contacts.”
Part 2: Sync Google Contacts to Android
Enable contacts to sync in Settings if your synced contacts don’t show up on your Android phone.
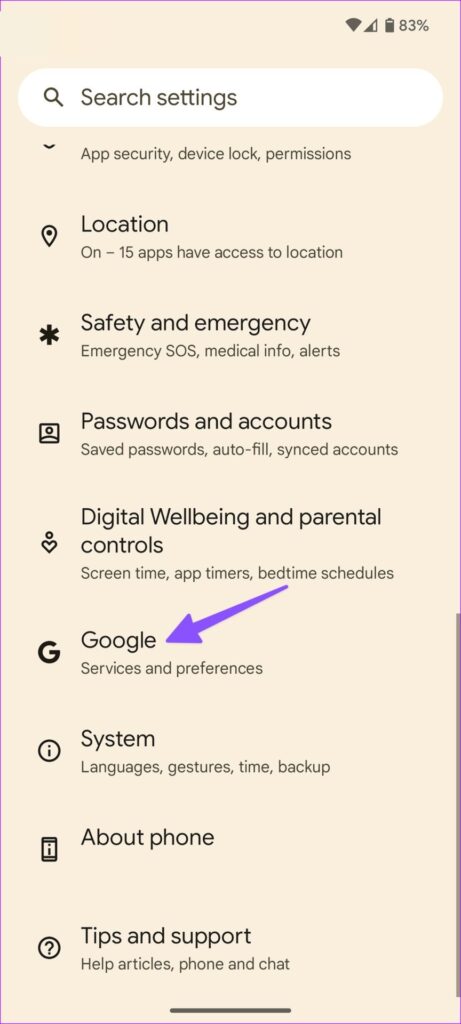
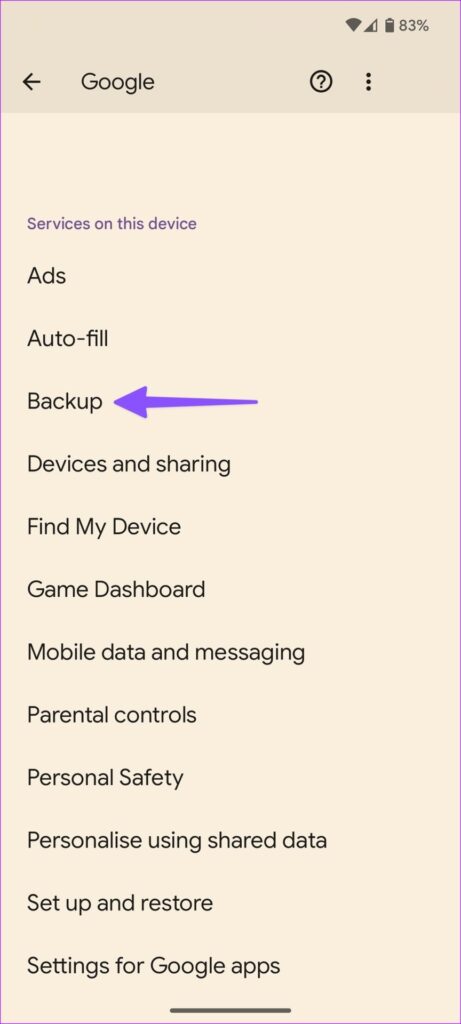
Step 1: Open the Settings app on your Android phone.
Step 2: Scroll to Google.
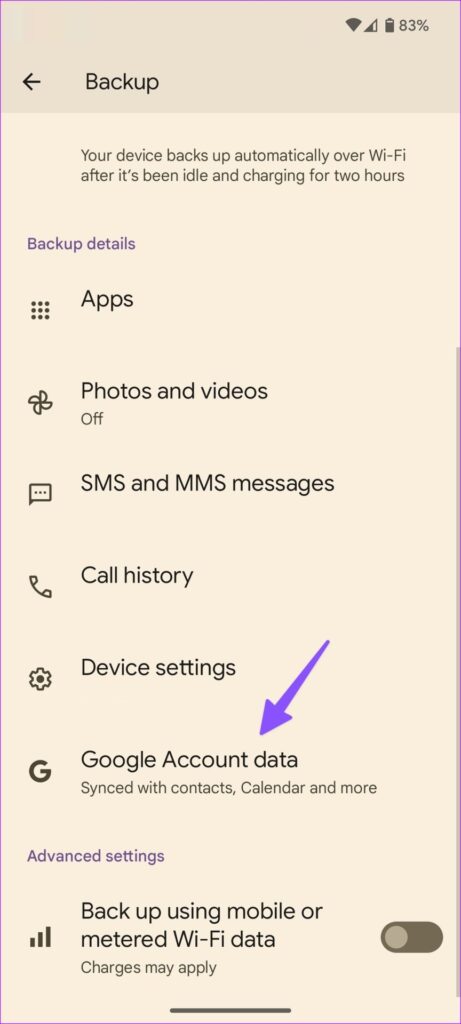
Step 3: Pick Backup.
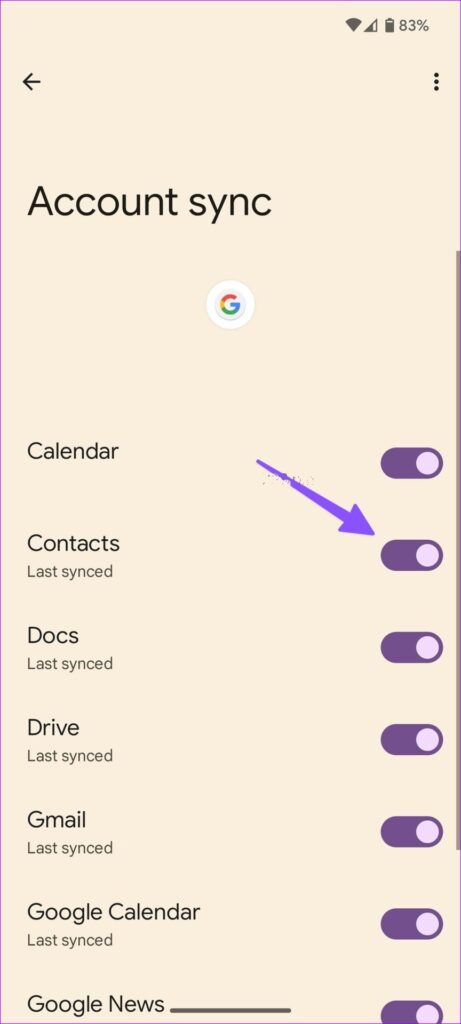
Step 4: Open your Google Account data.
Step 5: Turn on the toggle for Contacts.
Method 2: Use Google Contacts Export Tool to Generate a VCF File
The default Contacts app on Android is quite feature-rich and comes with an add-on to generate a vcf file. You can export the file to the phone storage or sync it to Google Drive.
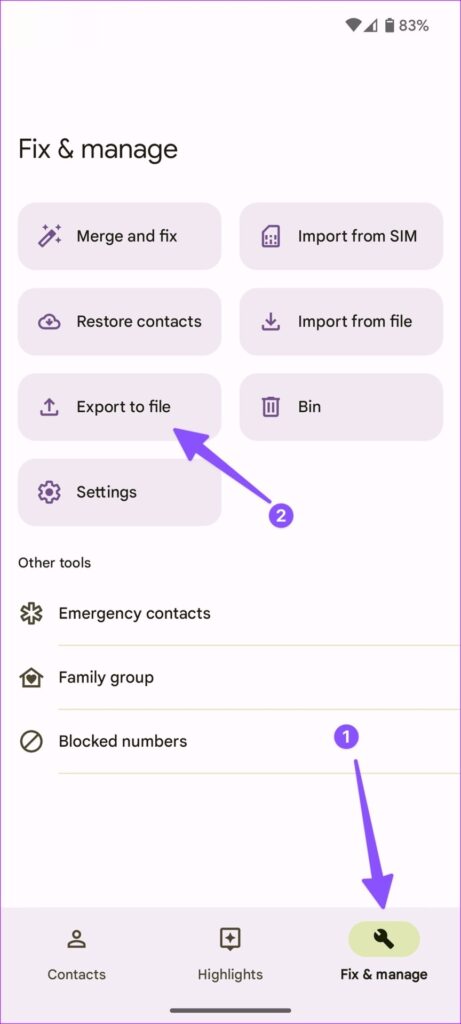
Step 1: Open Contacts on your Android phone.
Step 2: Select the Fix & manage tab at the bottom.
Step 3: Tap ‘Export to file’.
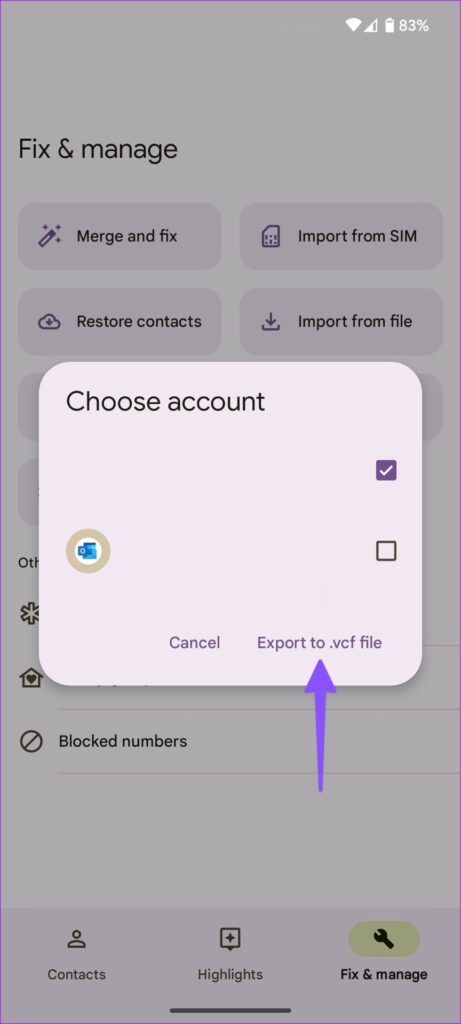
Step 4: Select your Google account and tap on ‘export to .vcf file’.
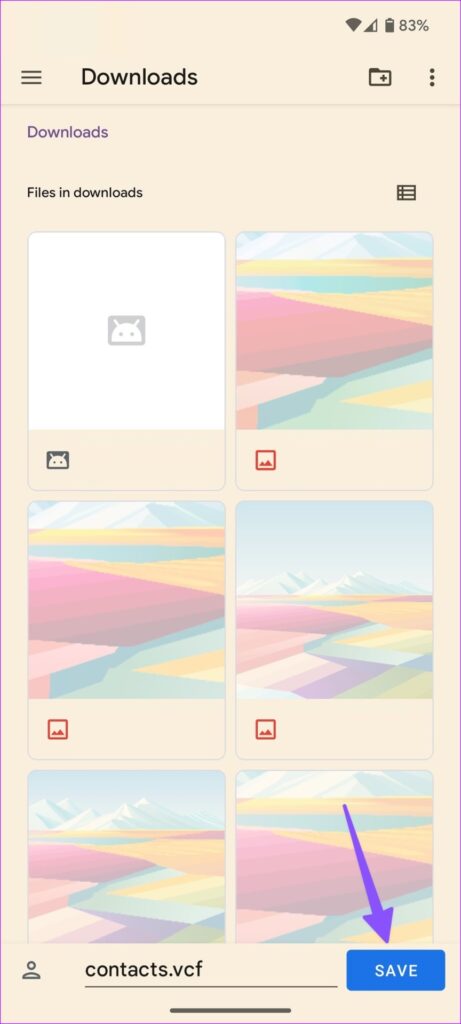
Step 5: Rename the vcf file and hit Save. You can tap the hamburger menu in the top left corner and select your Drive account to import contacts online.
Method 3: Back Up Android Contacts to a SIM Card
The default Contacts app on Pixel or a stock Android phone doesn’t offer an option to export Google contacts or device contacts to a SIM card. However, using an OEM contacts app, you can back up Android contacts to a SIM card. Let’s take Samsung’s Contacts app as an example.
Step 1: Open Contacts on your Galaxy phone.
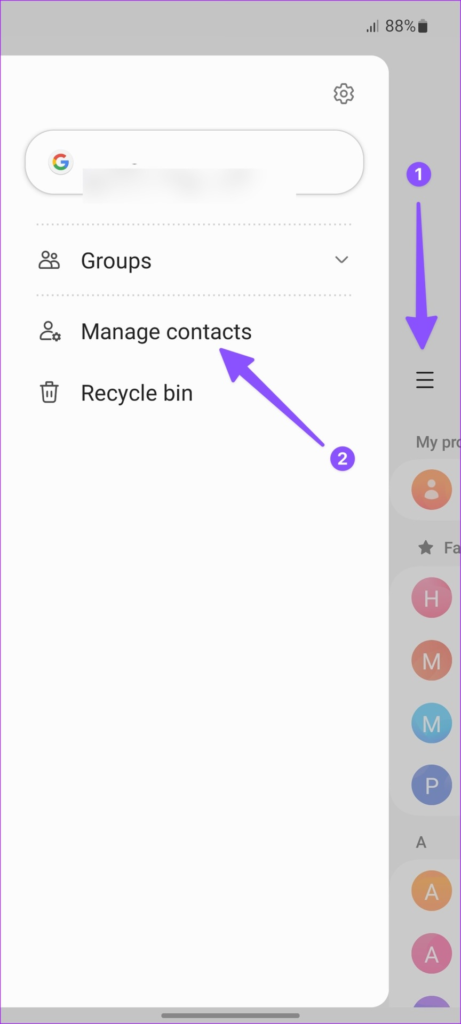
Step 2: Tap the hamburger menu and select Manage contacts.
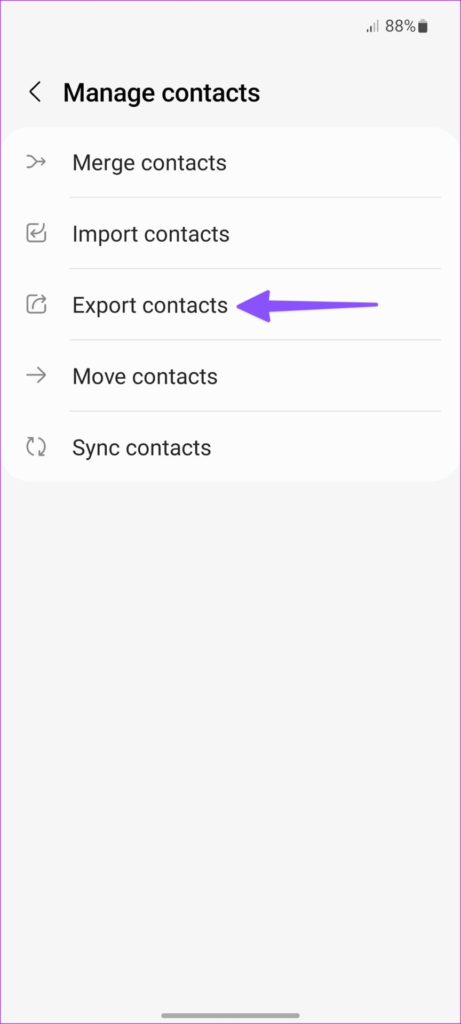
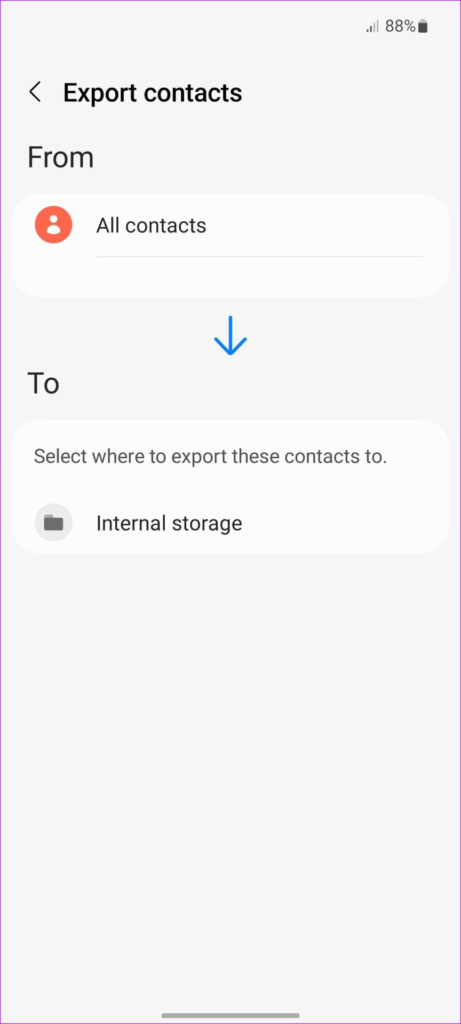
Step 3: Select Export contacts.
Step 4: Export your contacts to internal storage or a SIM card from the following menu.
Method 4: Use a Third-Party App to Import Contacts on Android
The Google Play Store is packed with capable apps to complete contacts backup on Android. One such ultimate backup tool is Super Backup & Restore. Let’s check it in action.
Step 1: Install the Super Backup & Restore app from the Google Play Store.
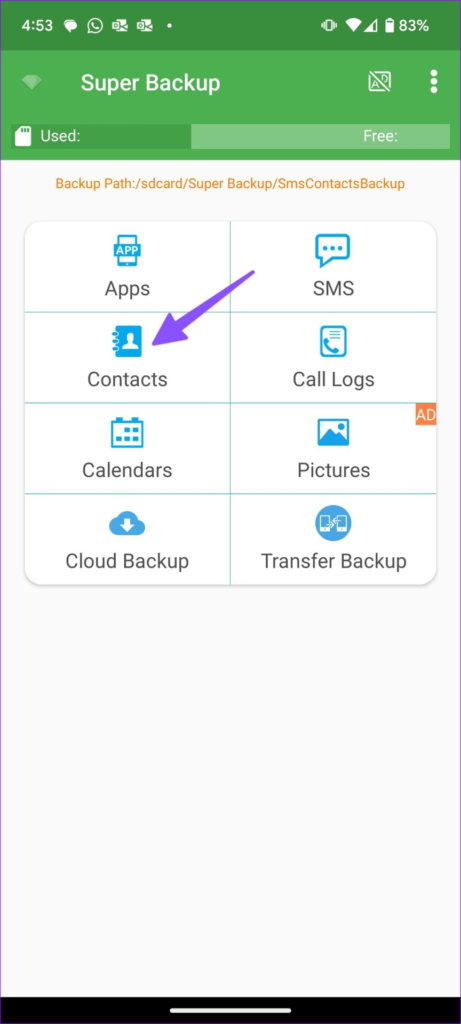
Step 2: Open Super Backup & Restore. The app will ask you to choose a folder to store backup files.
Step 3: Tap Contacts.
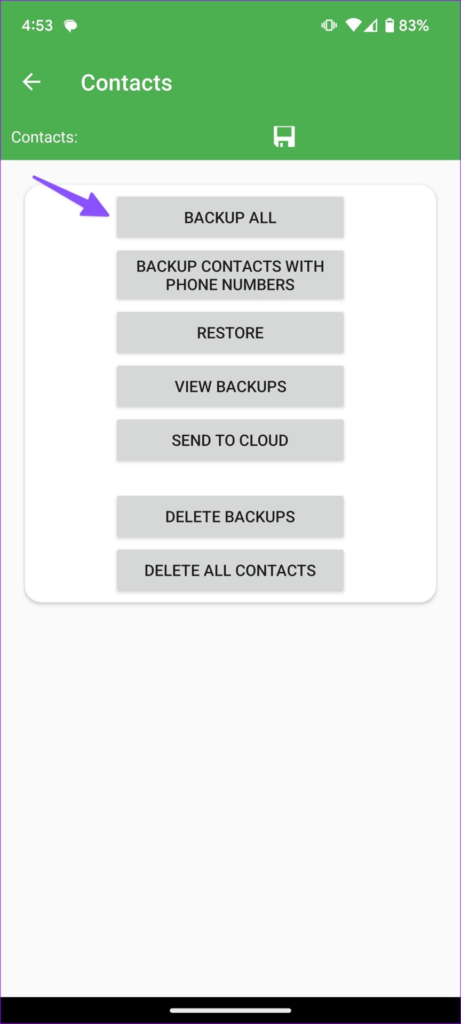
Step 4: Hit Backup all.
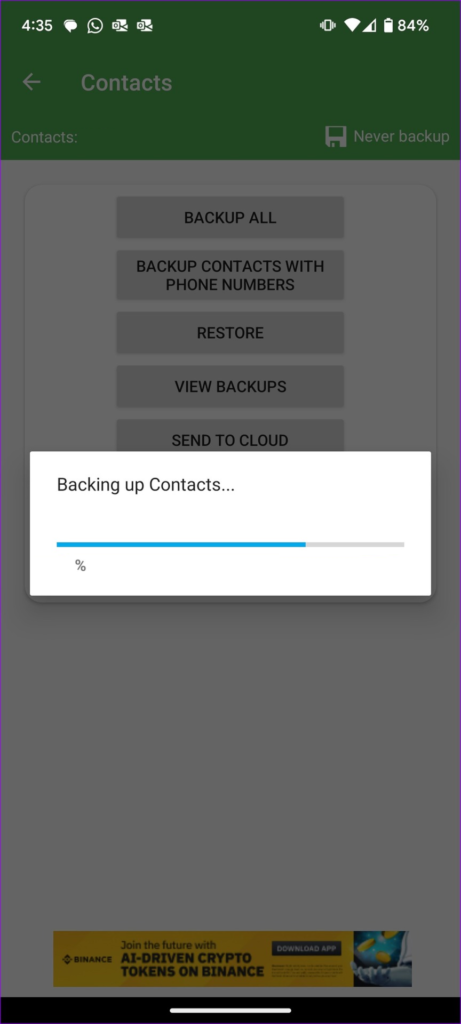
Step 5: Rename the .vcf file and start the backup process.
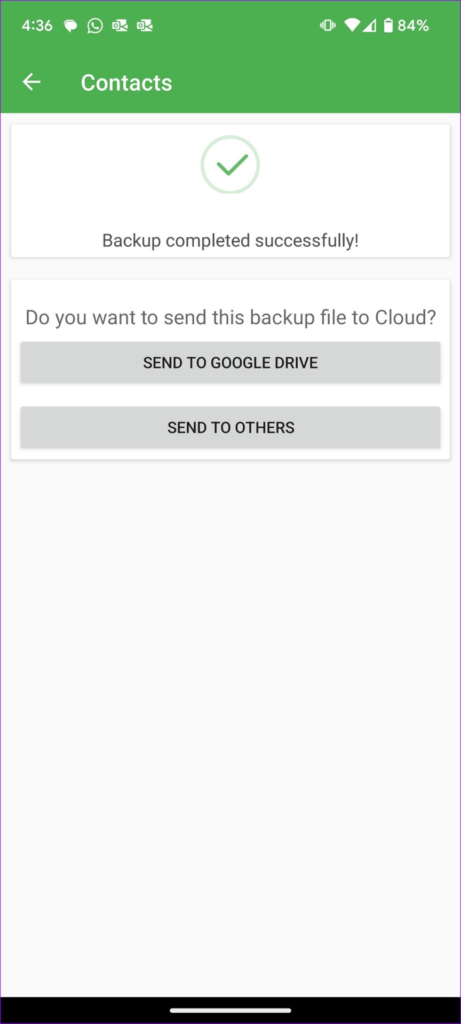
Step 6: You can send the contacts file using the default share menu or upload it to Google Drive.
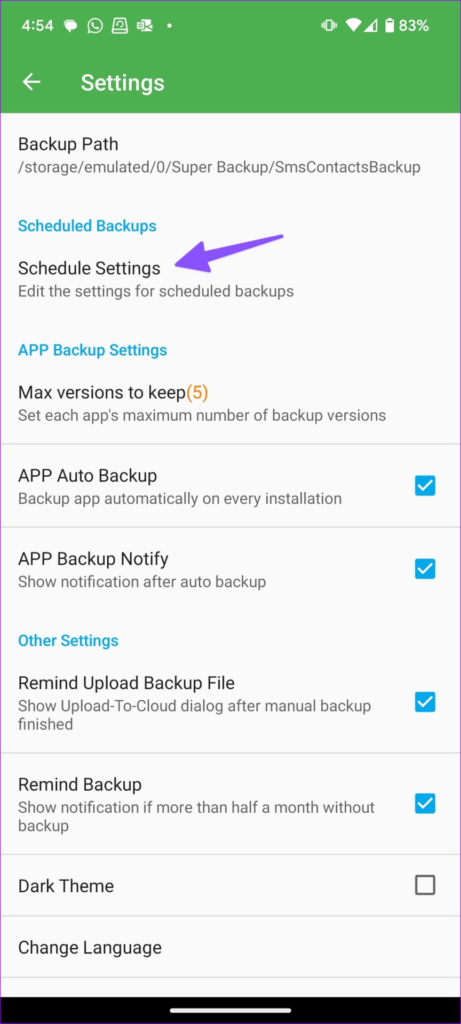
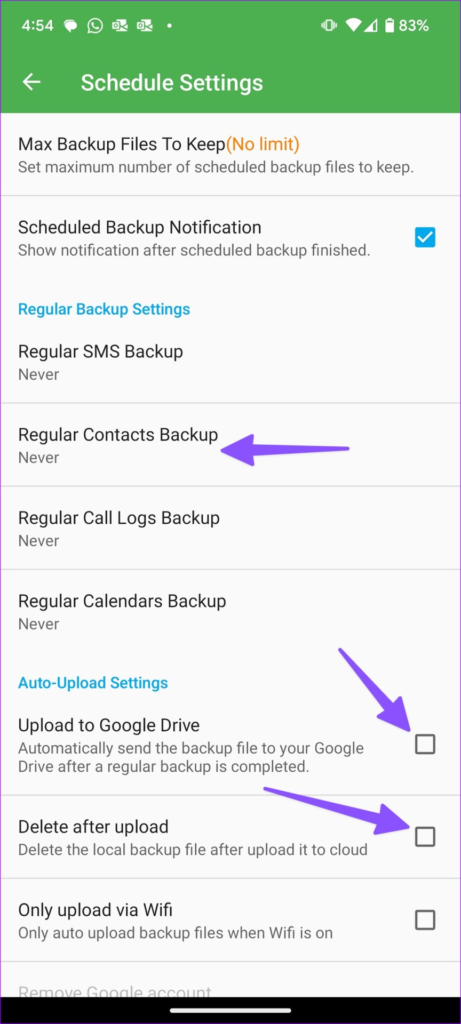
Additionally, the programme lets you periodically schedule backups. Select the default settings by going to Settings > Schedule Settings > Regular Contacts Backup.
Additionally, you can utilise the auto-upload options to automatically transfer the backed-up file to any email or Google Drive. To have the previous file automatically deleted after the operation, select the Delete after upload option.
Another capable contacts management tool for Android is Easy Backup. It also enables you to spot contacts that are duplicates.
Backing up your contacts on an Android phone is essential for safeguarding your valuable data. By following the step-by-step instructions provided in this guide, you can ensure that your contacts are securely backed up and easily accessible whenever you need them.
Whether you prefer using Google Account sync, exporting contacts to a vCard file, utilizing the default backup service, relying on third-party backup applications, syncing with other accounts, or importing contacts from a SIM card, there is a method that suits your preferences and requirements.
Remember, regularly backing up your contacts is recommended to keep them safe from unexpected data loss. Additionally, it is advisable to explore multiple backup options to create redundant copies and enhance data security. By following these steps, you can have peace of mind knowing that your valuable contacts are protected.
Taking the time to backup your contacts on your Android phone can save you from the hassle of manually re-entering or losing important contact information. So, make it a habit to periodically back up your contacts and ensure that you’re prepared for any unforeseen circumstances.
In conclusion, we have provided you with a detailed step-by-step guide on how to import contacts on your Android phone. The methods discussed in this article offer various options to suit different preferences and requirements.
Choose the method that works best for you and safeguard your contacts effectively. With these backup solutions at your disposal, you can confidently switch devices or recover your contacts whenever needed.


